
Cheap, Quick and Easy DIY Christmas (My Favorite)
It's that time again....time for the weekly blog party at the Newly Woodwards. I have gotten so many awesome ideas from the previous weeks of the party and I know this week will top that even more.
This week was Dare To...Deck the Halls and the challenge was to DIY a holiday decoration. Throughout the Dare To.... party one of my themes has been cheap. I am trying to not blow the bank on Christmas decorations which is very easy to do (at least it is for me because I have a slight addiction).
My other theme for this week is "quick." Like I mentioned last week, I am slightly behind in the handmade gifts department so all of my DIY time has been devoted to that endeavor without much time to spare. I had a grand idea for an Christmas card holder but I knew it was going to take me over an hour to construct and that is valuable quilting time. I will keep that one filed away for next year.
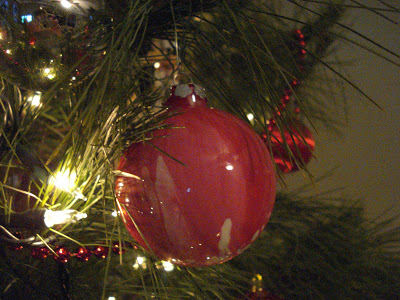
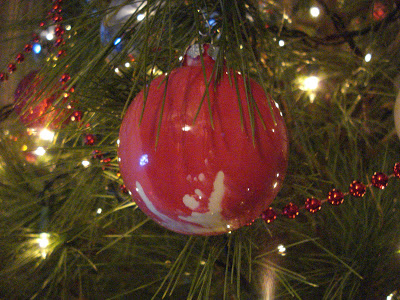
OK the first project. "Handpainted" and Unique glass ornaments. Doesn't sound quick huh? Well I am happy to report that they were so quick that when I hung them on the tree today Derek did not even realize I had snuck away to do them. They are also so easy that kids could do it and it would be a great family project.
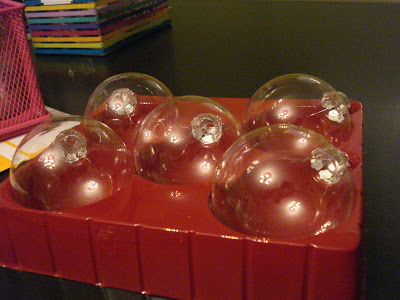
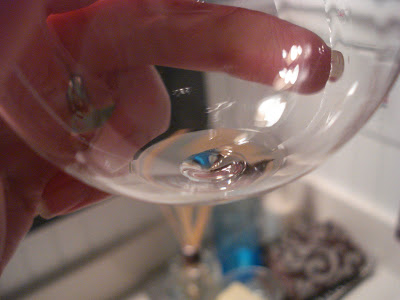
So how do you do it? Start with clear glass ornaments (I got these 60% off at Jo-Ann)
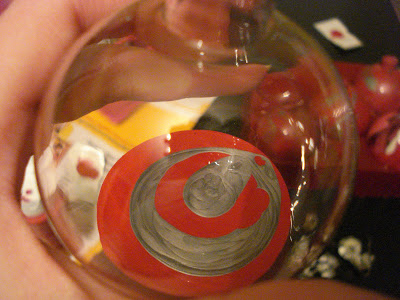
 Pop off the top and squirt in a couple of colors of acrylic paint. I used a variety of red, silver and ivory. I alternated squirts to layer the colors and get a cooler effect in my opinion.
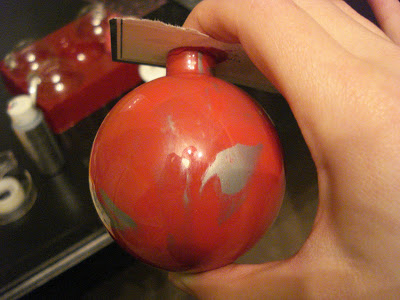
 Place a piece of cardboard or cardstock over the top....and shake shake shake.
Let dry overnight-
 And then pop the top back on and enjoy.
Couldn't be easier right?
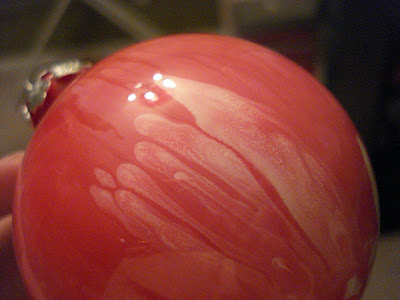
Of course I did a couple of variations. If you want your colors to be more flowey and less defined, add no more than four drops of water to the ornament before you squirt in the paint.
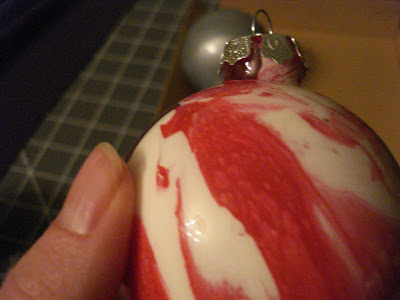
 Without the water you get this-

This week was Dare To...Deck the Halls and the challenge was to DIY a holiday decoration. Throughout the Dare To.... party one of my themes has been cheap. I am trying to not blow the bank on Christmas decorations which is very easy to do (at least it is for me because I have a slight addiction).
My other theme for this week is "quick." Like I mentioned last week, I am slightly behind in the handmade gifts department so all of my DIY time has been devoted to that endeavor without much time to spare. I had a grand idea for an Christmas card holder but I knew it was going to take me over an hour to construct and that is valuable quilting time. I will keep that one filed away for next year.
OK the first project. "Handpainted" and Unique glass ornaments. Doesn't sound quick huh? Well I am happy to report that they were so quick that when I hung them on the tree today Derek did not even realize I had snuck away to do them. They are also so easy that kids could do it and it would be a great family project.
So how do you do it? Start with clear glass ornaments (I got these 60% off at Jo-Ann)
Pop off the top and squirt in a couple of colors of acrylic paint. I used a variety of red, silver and ivory. I alternated squirts to layer the colors and get a cooler effect in my opinion.Place a piece of cardboard or cardstock over the top....and shake shake shake.Let dry overnight-
And then pop the top back on and enjoy.Couldn't be easier right?
Of course I did a couple of variations. If you want your colors to be more flowey and less defined, add no more than four drops of water to the ornament before you squirt in the paint.
Your colors will look more like this with the water-
Without the water you get this-Also you do not have to cover all the glass in the ornament when you shake since the inside looks cool too-
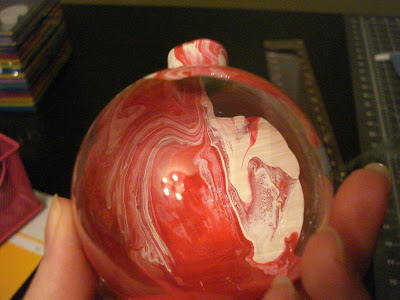
There you have it-10 completed ornaments in 15 minutes all ready to hang on the tree.
I also did a little side project that won't win me any DIY awards but I wanted to share it anyway.
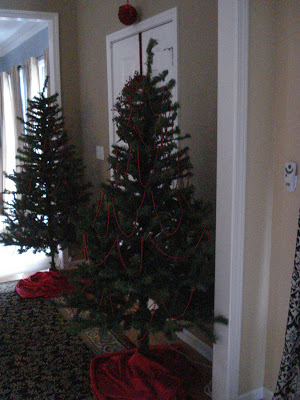
I always struggle with decorating the entry way because it is not a lot of space with a lot of doorways. We have two matching artificial trees that were given to us by the in-laws when they no longer used them. Since we have gotten a live tree the past couple of years they have been gathering dust in the basement. So this year I flanked the door with them.
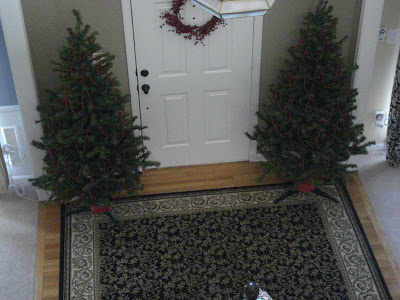
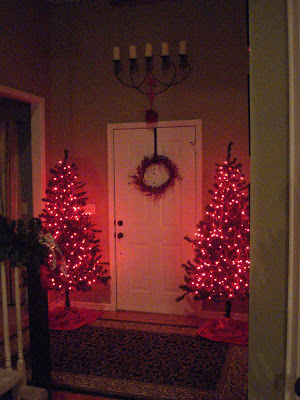
I went with an all red theme with red lights and red beads. But I wanted to keep it simple so the main tree was still the focal point. We also were missing tree skirts. Again, since I am trying to be cheap this year I did not want to just go out and buy two. I was also concerned that a full size skirt would be too large in order for the door to clear.
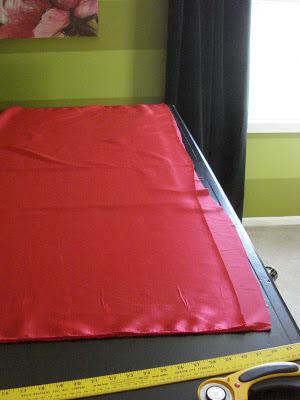
So I went to Hobby Lobby and bought a yard and a half of red satin for $3.
I squared it off and cut it in half.
 and wrapped the rectangles around the base.
 The finished product-
There you have it-10 completed ornaments in 15 minutes all ready to hang on the tree.
I also did a little side project that won't win me any DIY awards but I wanted to share it anyway.
I always struggle with decorating the entry way because it is not a lot of space with a lot of doorways. We have two matching artificial trees that were given to us by the in-laws when they no longer used them. Since we have gotten a live tree the past couple of years they have been gathering dust in the basement. So this year I flanked the door with them.
I went with an all red theme with red lights and red beads. But I wanted to keep it simple so the main tree was still the focal point. We also were missing tree skirts. Again, since I am trying to be cheap this year I did not want to just go out and buy two. I was also concerned that a full size skirt would be too large in order for the door to clear.
So I went to Hobby Lobby and bought a yard and a half of red satin for $3.
I squared it off and cut it in half.
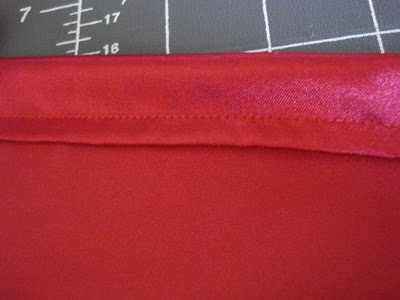
Then I seamed all four sides.....
and wrapped the rectangles around the base.The finished product-So much cheaper and easier than cutting and sewing a circle.
Head on over to Kim's the check out all the other great ideas!
I am also linking to:

Head on over to Kim's the check out all the other great ideas!
I am also linking to:
