Houston We Have Bedding
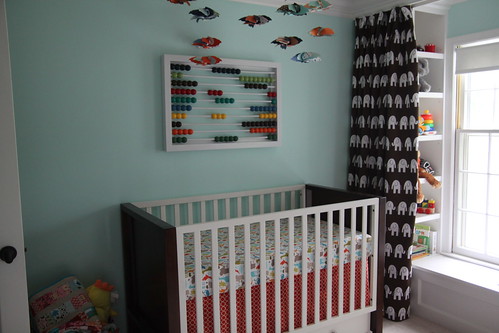
The nursery is still a work in progress, but now at least he will have a cute and comfy place to sleep if he decides to appear early. His quilt? Not ready to be in this post. And the quilt is more for me to look at anyway since he won’t be sleeping with it for awhile. At least that is what I tell myself.
This whole being off for the summer thing is doing wonders for my sewing productivity. Now I just need to start fitting in showers before the afternoon.
Anyway…
One of the most difficult things about the bedding was picking out the fabrics. They had to be certain colors…and kidish…but not over the top kidish…and possibly go with our loose “animals” theme. I had lists and lists of options and struggled with making a decision as there were so many cute things out there. I finally gave myself a deadline and started ordering things. And then it sat until I got around to actually sewing it. I know you are surprised.
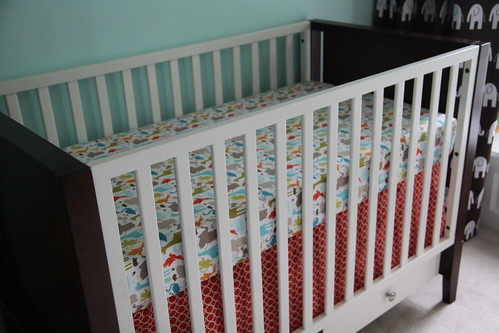
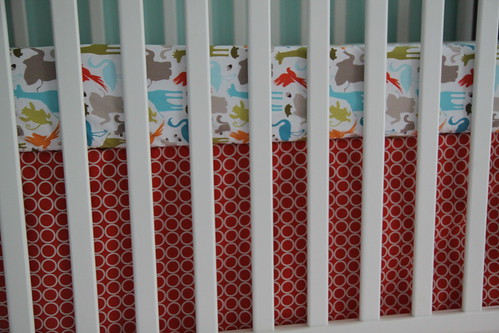
First up….the crib skirt. The fabric I used was Metro Living by Robert Kaufman.
Not exactly rocket science but I needed to cover the ugly gap between the mattress and the drawers. The metal brackets were visible holding up the mattress and the drawers of the crib do not have tops on them so you can see all the stuff in them. I also wanted to make it adjustable so that when we lower the mattress as he gets bigger, I can make the crib skirt shorter.
First, I prewashed the fabric and measured my opening. I added a couple of of extra inches to the tops and sides and then cut out a rectangle of fabric. I seamed the sides and added ribbon ties.
Then I tied the ribbon to the springy part of the crib (that’s the technical term) adjusting for height.
After a couple of reties to even everything out and get it to hang straight, I had this.
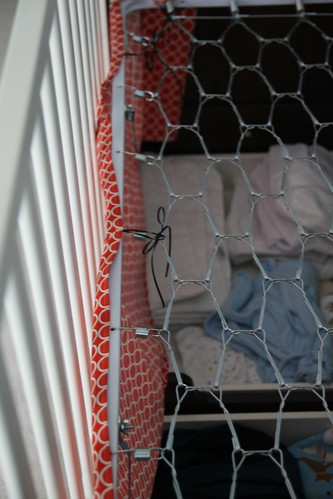
So as the mattress gets lower and the skirt needs to get shorter, I can just retie further up. Super simple but I love how it turned out.
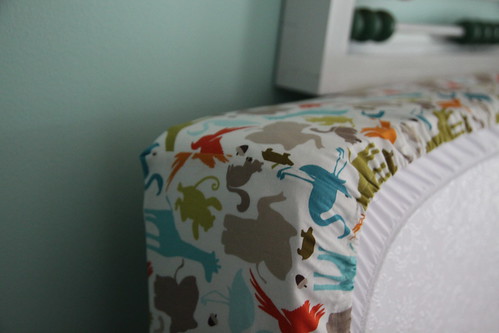
Now onto the crib sheet.
For some reason this project was intimidating to me so I have been putting it off for awhile. I found tons of tutorials online with slight variations. Which one to choose? How do I know there and my mattress dimensions were similar?
I think my major anxiety came from the fabric. It is Central Park by Kate Spain and when I ordered it months ago, that print in that color was starting to become difficult to find in the yardage I needed. So I knew that after I procrastinated that it was going to be really hard to find if I had to replace it when I royally messed it up. Hello new fabric choice or spending way to much money for it on ebay. So it continued to sit.
I finally decided to on this tutorial from luvinthemommyhood. From what I read reading comments on other tutorials, elastic all the way around the sheet was more secure than just the corners. Since it was quilting cotton, my fabric was a little narrower than I would have hoped but I decided to take a leap of faith. I am not going to do a whole step by step because I followed her tutorial pretty closely. With the exception of measuring four times before I cut anything. And marking and pinning all the cuts and trying on the mattress to make sure it fit before I cut and sewed. So it took 6 times as long but oh well. I was not going to screw up this fabric.
The only difficult part was inserting the stupid elastic. Luckily for me, my bobbin ran out of thread in the middle of sewing the elastic pocket. I cursed at the time but thought I would try to string it through halfway and see how it worked since I had to stop sewing until it was reloaded anyway.
I could have been executing her whole “attach a pin and let it slide through” method totally incorrectly but it did not work for me. At all.
So I got out this doohickey (another technical sewing term) that I had bought for some other project that has never seen completion. It came in handy for this one, so ultimately a good purchase.
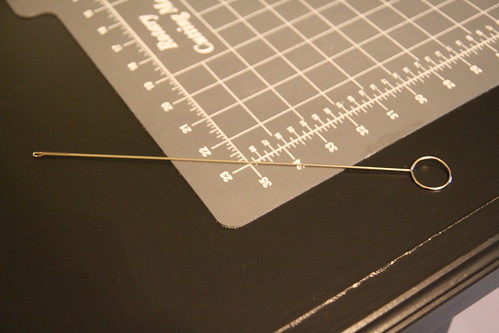
I had the pull the elastic through in phases because the wire was not long enough, but worked so much easier for me.
After the elastic was in and sewn, I had the nerve wracking experience of slipping it on the mattress. And really really hoping it fit.
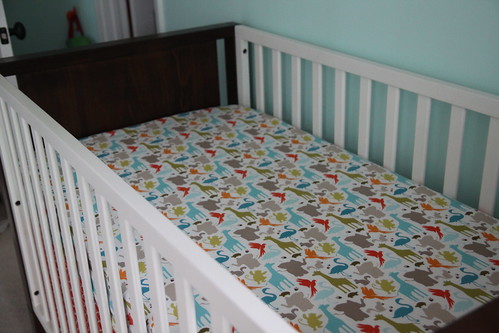
It did! Happy day! And it turned out to be a easy project….time to make some more.
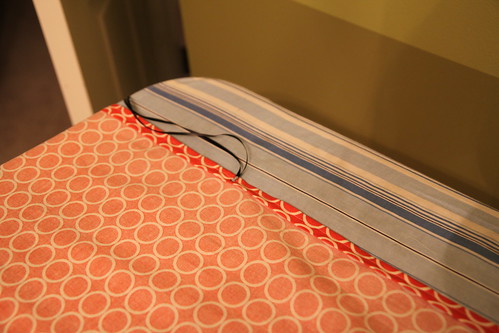
In case you were wondering what the underside looks like….
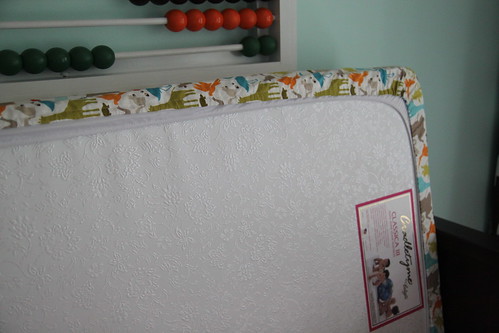
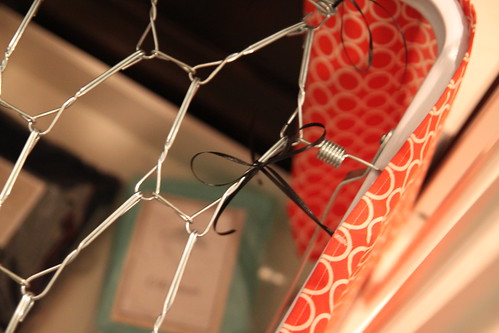
And the corners….
It is actually starting to come together. Just a couple of sewing and DIY projects left!