
Holiday Yum
Call me boring and unoriginal, but my all-time favorite Christmas cookie is the sugar cookie. I loved decorating them every year when I was growing up and would eat them before any one else had a chance. Also since I have a nut allergy which eliminates 70% of holiday cookies, this variety is an easy favorite. When I began to make my own sugar cookies as an adult, I started the hunt for the perfect recipe. There are so many recipes out there that it was difficult to narrow it down to the good ones. I like my sugar cookies thick and soft so that was the main criteria.
 After a lot of trial and error recipes from Allrecipes were the definite winner. I have not made a batch of them this year yet (because frankly the entire batch would disappear within a couple of days because I have no self control with these babies) so my pictures from last year were more for documentation and not very blog worthy or pretty. I will take better pictures this year....promise.
Sugar Cookie
Frosting
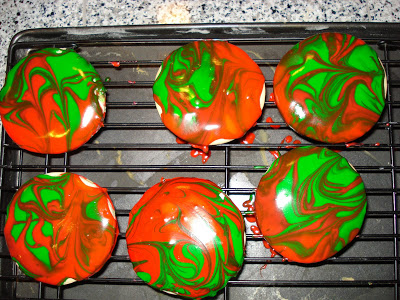
I roll the dough out pretty thick in order to get a really soft cookie. They only rise slightly when you bake them, so use that is a guide for how thick you decide to roll them out. For Christmas, I just use a top of a drinking glass to make the circle shape. Then I use the paste food coloring (the liquid kind does not give me bright enough colors in my opinion) to make red and green. I put a dallop of red and a dallop of green on each cookie and swirl it with a kabob skewer (a fork would work as well). The icing is a little drippy so have something under the cooling racks to catch it. It hardens to a shiny marble finish which I think looks great and is super easy. And everyone will be impressed that you took so much time on them (or at least that is what my friends and coworkers say....they could be lying)
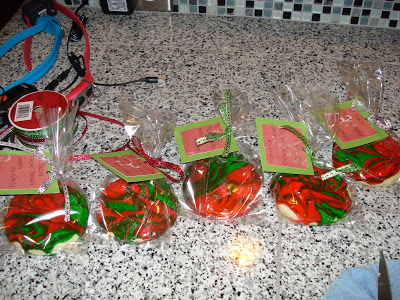
I also give tons away as gifts to coworkers which has resulted with many requests for the recipe. It is a super easy to just slip them in a bag and add a cute tag.
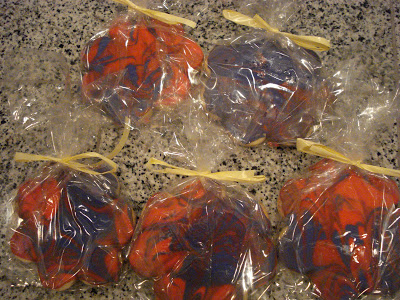
 Also with a quick color change you can use these cookies for many occassions like favors for a baby shower-
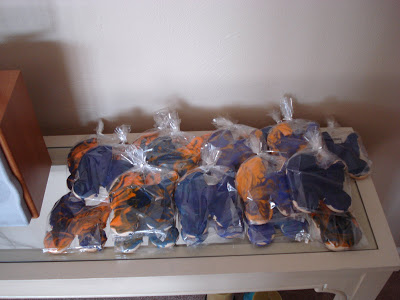
Or for secretaries day-
And while this has nothing to do with a recipe exchange, no post about the sugar cookies is complete without the story of the cookies of Christmas 2008.
The story stars Jack as the main culprit-
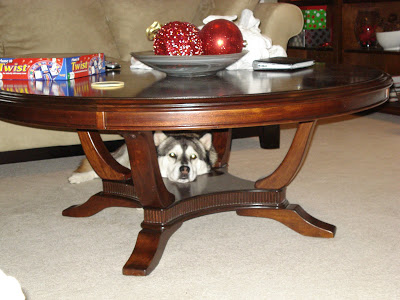
 And Winter and his trusty sidekick-
Two weeks before Christmas, I had made four batches of cookies and had them all allocated for staff at my different schools as well as other gifts. I put the first batch in bags and took them to work with me and left the rest in sealed Pyrex at the back of the counter.
I came home to this-
 No cookies to be found. Jack and Winter never jump on the counter and we do not even crate them during the day when we are at work because they usually stay out of trouble. Luckily they did not have any glass stuck in their paws and if they ingested any while extracting the cookies, it all worked out OK. At this point I had no time to make any more so one of my schools got jipped out of their cookies because of misbehaved puppies. So a word of warning: do not leave these cookies on your counter even in a sealed glass container as your pups will still somehow sniff them out and have a sugar feast while you are away.
This recipe is part of the DIY blog party at the NewlyWoodwards. This week the Dare To- Eat Cookies and I can't to try some concoctions of the talented bloggers out there!


After a lot of trial and error recipes from Allrecipes were the definite winner. I have not made a batch of them this year yet (because frankly the entire batch would disappear within a couple of days because I have no self control with these babies) so my pictures from last year were more for documentation and not very blog worthy or pretty. I will take better pictures this year....promise.Sugar Cookie
Ingredients
- 4 cups all-purpose flour
- 1 teaspoon baking powder
- 1/2 teaspoon baking soda
- 1/2 teaspoon salt
- 1/4 teaspoon ground nutmeg
- 1 cup butter, softened
- 1 1/2 cups white sugar
- 1 egg
- 1 teaspoon vanilla extract
- 1/2 cup sour cream
Directions
- Sift together the flour, baking powder, baking soda, salt and nutmeg; set aside. In a large bowl, cream together the butter and sugar until smooth. Beat in the egg, vanilla and sour cream until well blended. Stir in the sifted ingredients. Wrap dough in plastic wrap and chill overnight.
- Preheat the oven to 375 degrees F (190 degrees C). On a lightly floured surface, roll the dough out to 1/4 inch in thickness. Cut into desired shapes with cookie cutters. Place cookies 1 1/2 inches apart onto ungreased cookie sheets.
- Bake for 8 to 10 minutes in the preheated oven. Allow cookies to cool on baking sheet for 5 minutes before removing to a wire rack to cool completely.
Frosting
Ingredients
- 2 cups confectioners' sugar
- 4 teaspoons milk
- 4 teaspoons light corn syrup
- assorted food coloring
Directions
- In a small bowl, stir together confectioners' sugar and milk until smooth. Beat in corn syrup until icing is smooth and glossy. If icing is too thick, add more corn syrup.
- Divide into separate bowls, and add food colorings to each to desired intensity. Dip cookies, or paint them with a brush.
I roll the dough out pretty thick in order to get a really soft cookie. They only rise slightly when you bake them, so use that is a guide for how thick you decide to roll them out. For Christmas, I just use a top of a drinking glass to make the circle shape. Then I use the paste food coloring (the liquid kind does not give me bright enough colors in my opinion) to make red and green. I put a dallop of red and a dallop of green on each cookie and swirl it with a kabob skewer (a fork would work as well). The icing is a little drippy so have something under the cooling racks to catch it. It hardens to a shiny marble finish which I think looks great and is super easy. And everyone will be impressed that you took so much time on them (or at least that is what my friends and coworkers say....they could be lying)
I also give tons away as gifts to coworkers which has resulted with many requests for the recipe. It is a super easy to just slip them in a bag and add a cute tag.
Also with a quick color change you can use these cookies for many occassions like favors for a baby shower-Or for secretaries day-
And while this has nothing to do with a recipe exchange, no post about the sugar cookies is complete without the story of the cookies of Christmas 2008.
The story stars Jack as the main culprit-
And Winter and his trusty sidekick-Two weeks before Christmas, I had made four batches of cookies and had them all allocated for staff at my different schools as well as other gifts. I put the first batch in bags and took them to work with me and left the rest in sealed Pyrex at the back of the counter.
I came home to this-
No cookies to be found. Jack and Winter never jump on the counter and we do not even crate them during the day when we are at work because they usually stay out of trouble. Luckily they did not have any glass stuck in their paws and if they ingested any while extracting the cookies, it all worked out OK. At this point I had no time to make any more so one of my schools got jipped out of their cookies because of misbehaved puppies. So a word of warning: do not leave these cookies on your counter even in a sealed glass container as your pups will still somehow sniff them out and have a sugar feast while you are away.This recipe is part of the DIY blog party at the NewlyWoodwards. This week the Dare To- Eat Cookies and I can't to try some concoctions of the talented bloggers out there!
