
Stumped
Do you ever come up with an idea that you think is awesome but everyone you tell about it thinks it sounds stupid?
Yeah this was this project. Luckily my husband loves me enough to spend a lot of time on a project which he was convinced was going to flop. Who needs diamonds when you have DIY?
Back to the beginning…..
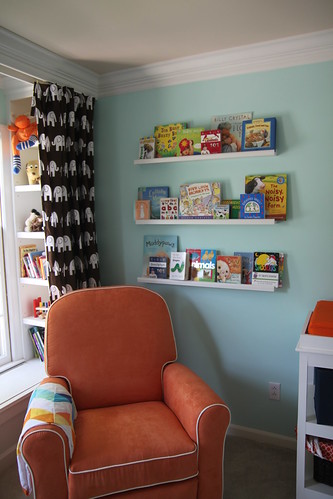
I wanted a side table next to the rocker in the nursery to be able to set things like drinks, burp cloths, cell phone etc. Problem was we did not have a lot of space.
I looked high and low for a small side table that would fit and not looked too cramped. And not be breakable.
This search took awhile and I almost did a ceramic garden stool because of the correct size and shape, but it was pretty light and would be easily knocked over and shattered. It was during this search that I came up with the idea of a stump table.
Not that it was an original idea….West Elm sells one for $200 and Mrs. Brooklyn Limestone made one herself. So why did every time I mention it to someone did I get this reaction…”A Stump? Really?”
Even from my husband. But being the good sport he is, he proceeded with the project as long as he “had veto power in the end”
Yeah!
So first task….finding a stump. Hmmmmm. Derek called lumber yards and tree removal places but was not very successful. (Again, he must love me since I know he got a lot of incredulous “you wanna buy a stump???!” when he made these phone calls. Hasn’t anyone seen the West Elm catalog recently?) So far no stump. Maybe it was not meant to be.
Then on the Friday before Easter, a tornado hit very close to my parent’s house in St. Louis. Miraculously no one was hurt. But by close I mean the damage started 6 houses from the entrance to my parent’s subdivision. Scary stuff. Their house had zero damage, but they kept telling me that I just needed to come visit because there were tons of stumps everywhere around them.
I laughed it off because I knew that they thought the stump table was dumb and was I really going to take advantage of a natural disaster to get my table?
But then we came into town a week or two later (unrelated to the stump I swear)….and they were right… there were stumps sitting by the road everywhere, just waiting for the city to pick them up and dispose of them.
I was still a little iffy on the tornado stump. But from my parent’s perspective it was going to be gotten rid of anyway and a stump from there would have meaning unlike a random piece of wood from a lumber yard. Like being thankful…and making sure you head to the basement when the tornado sirens go off.
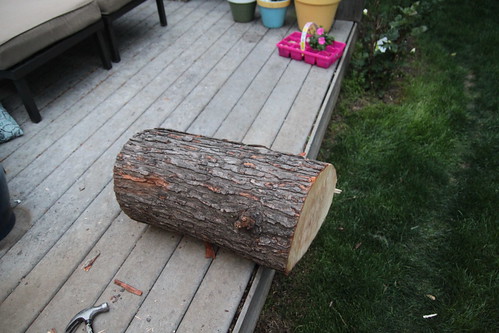
So while I was napping, Derek did a little stump recognizance to find the perfect specimen and the stump was buckled in the backseat on the way home. Would have been weird to explain that one if we had gotten pulled over.
The stump in all it’s glory.
Now what we he did to it to make it table-like:
1. Using a crowbar and hammer remove all the bark. According to Derek, this step was pretty easy.
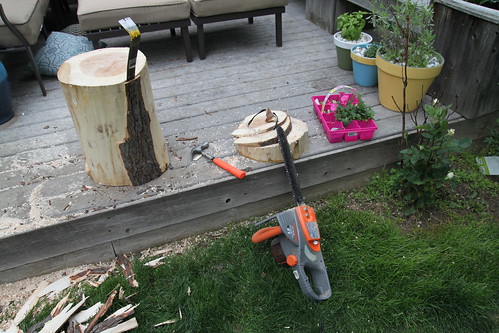
2. If your stump is uneven or too tall, even it out the best you can with taking off slices with a chain saw.
3. The longest part…..sand. And then sand some more. And when you think you are done sanding do it again.
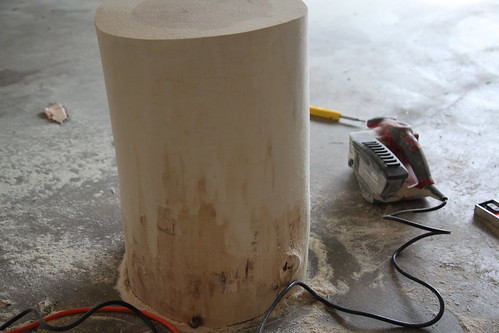
For this project, we became the proud owners of a belt sander. Which I was told made the sanding go so much faster than an orbital sander. He started with a lower grit sand paper and moved up to a finer grit to make it smooth. He sanded it while the wood was still considered “green” as it had only been cut down at this point for a couple of weeks.
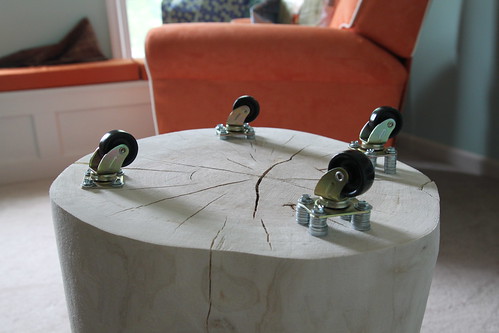
4. Add wheels for easier movement (stumps are heavy) to help level it even more. He used washers to help achieve this.
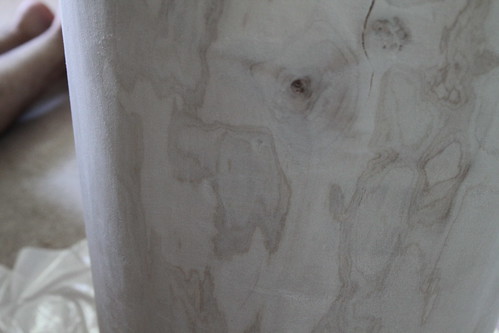
5. Since our wood was still green, we let it then sit in the space for a couple of months to dry out with plastic underneath in case it dropped sap. As it dried it starting to develop cracks and the grain became more apparent….yeah!
6. You could leave it the natural stump color, but I knew I wanted it darker to match the other wood in the space. But I was not sure how long had to wait for it to dry before it would accept stain. We were at 2 months. Google did not give me a definite answer, so I decided to test some colors and see how it took it on the bottom.
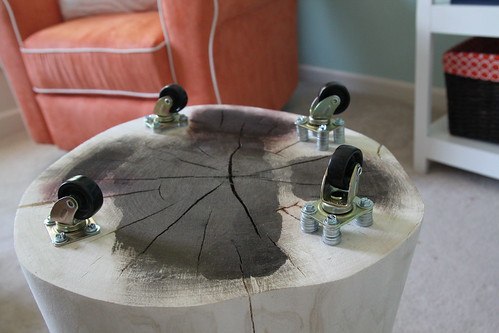
It sucked it right up, so I decided to go ahead with the stain. Worse case scenario, it looks awful and Derek can just sand it again. I kid.
Derek gave it one final sand with a very fine sandpaper and I stained it with MinWax Jacobean.
And this is what we came up with-
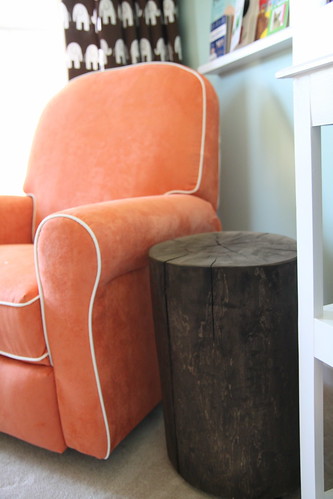
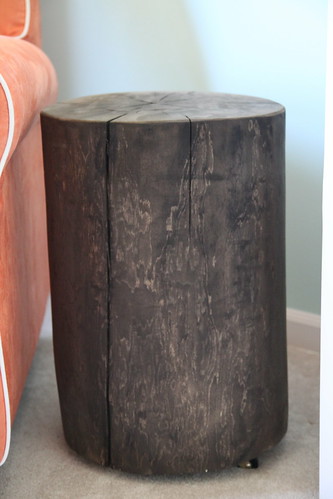
I love that it is not perfect and adds a rustic element. And it is the perfect size and height for the chair.
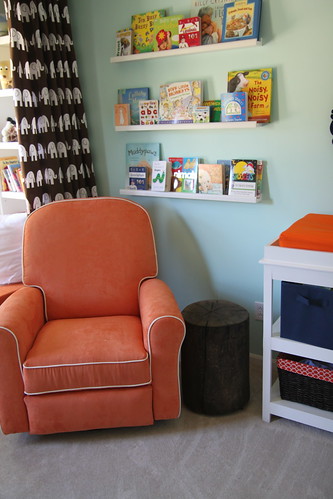
I am going to add polyurethane to protect it in the next couple of months, but for now I think it still needs to breathe and dry before I seal it. Since I am a wood expert and all. In the meantime we will protect the finish something on top like a piece of glass.
And I am happy to report that “veto power” was not needed. Which is good since he would have wasted all of that sanding for nothing. And we got a new belt sander out of the deal.