
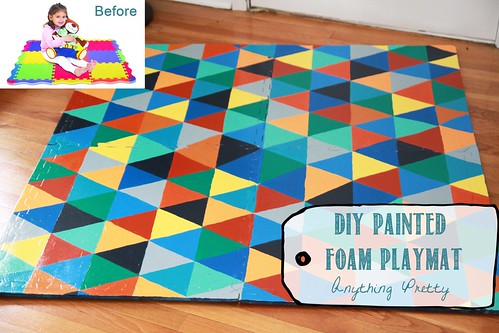
DIY Painted Foam Play Mat
I pin a lot of things. And I have grand plans to complete oh 85% of them. But somehow that does not happen and my pins just sit there looking pretty on my boards. Maybe even mocking me a little bit.
As part of the Pinterest challenge over at Young House Love, Bower Power, Decor and the Dog and The Remodeled Life I decided to change that. I probably should have chosen a faster project, or at least one with less drying time. But thanks to two blizzards and days off work, this one got done.
Carter needed a play mat for his playspace. And it needed to be indestructible. And easy to clean. Not to mention attractive. Finding nothing that fit the above criteria, I decided to DIY.
I was inspired by this…

Source: designsponge.com via Jenny on Pinterest
(originally posted at Design Sponge)
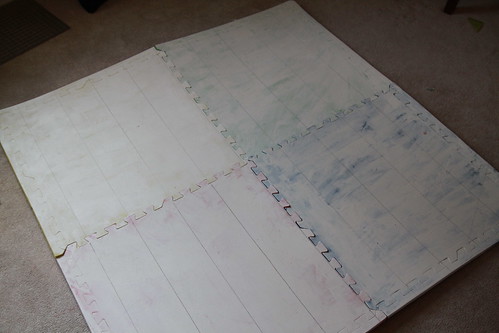
The basic how-to is pretty simple. Buy a cheap foam play mat, prime the non-bumpy side and paint with acrylic paints. Finally seal with a couple of coats of polyurethane.
Easy and quick if you decide to make a large scale design with a couple of colors. Small triangles on the other hand took a while to paint. Especially since it took multiple coats to achieve color saturation.
But it was easy to paint while I was watching TV and somewhat relaxing to do- triangle after triangle after triangle.
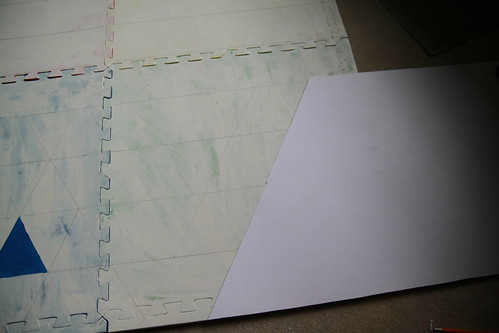
In order to draw out the design, I used my sewing cutting mat to make a template out of cardboard of a 60 degree angle.
I drew straight lines on the primed mat-
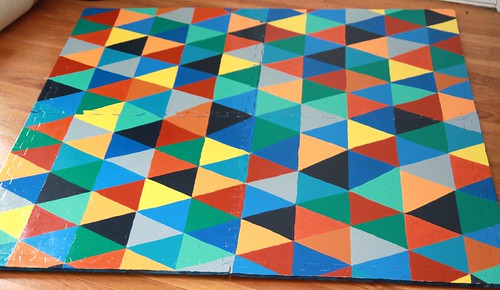
And then used the template to draw in the angles. My triangles are approximately 5 inches. I mismeasured at some point and my triangles got a little jacked up in the middle. I figured out my mistake, but did not want to re-prime and re do all my lines so I decided to channel my inner Tim Gunn and “make it work”.
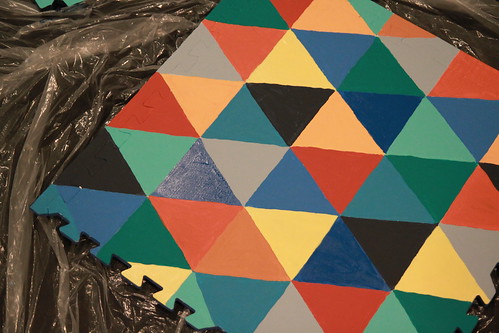
I did not use tape to paint the triangles with the acrylic paint, so my lines are not perfectly straight but I like it that way as I think it looks more hand-painted. At least that is what I am telling myself because it would have taken forever to tape.
Three coats of gloss polyurethane later, we have this.
All ready to be played on.
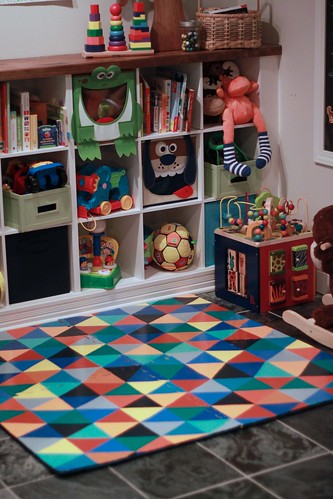
In the basement play space that almost gets no direct light for decent pictures. Especially when there is two feet of snow outside covering the windows.

The play area has had some other projects go in it, but I waiting until everything was done to blog about the space. The rug was the last one, so that should be coming up.
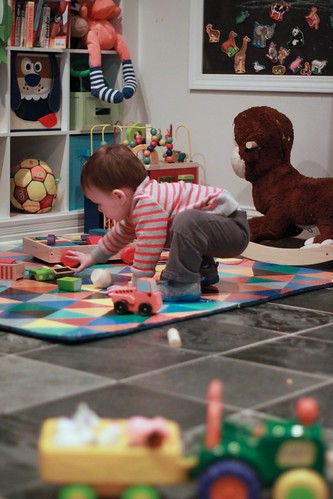
So how does it hold up? It has not cured the complete 24 hours as instructed but has already held up to books being dropped on it and a rousing game of stacking and knocking down blocks. Before the poly went on, it seemed like it would crack easily. But with the poly it seems a lot more pliable. I will keep you posted. For now it is a hit.
And I am not painting triangles for awhile.