
Hanging Around
Ready for the last laundry room post? Have I dragged it out long enough considered we started this journey a little less than a year ago?
But I know you have been waiting for the final how-to….the drying rack.
Like I mentioned before, it was totally inspired by Centsational Girl who was totally inspired by Ballard Designs.
And Derek was inspired by the pile of wood and all his tools out in the garage during the bed-making process. And possibly by me asking really really nicely.
So I showed him the great tutorial by Kate, told him I would like some molding around ours, and no hanging hooks since we already had tons of hanging space.
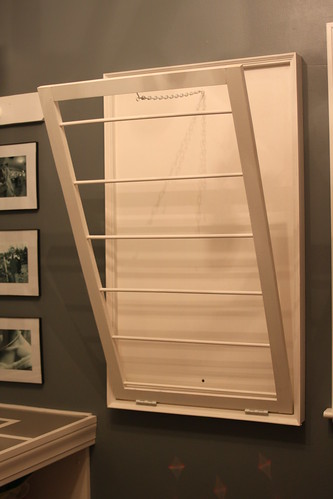
And he came up with this-
I will not go into an incredibly detailed how-to because Kate already did such a great job. And because I knew I was pushing my luck with another project in the middle of the bed so I decided to not act like the paparazzi and stalk him while he was putting it together. Instead every time he walked into the house, I would nonchalantly stroll out there with my camera. Shhhh…I am sure he had no idea what I was doing. Especially considering he kept saying things like “do you need a picture of this for the blog?”
So here is the quick and dirty version-
1. Start with a piece of wood the size you want your drying rack to be and add molding to the edges to frame it. Again, just like the bed, straight boards are your friend, especially since it will be fitting snugly next to the frame.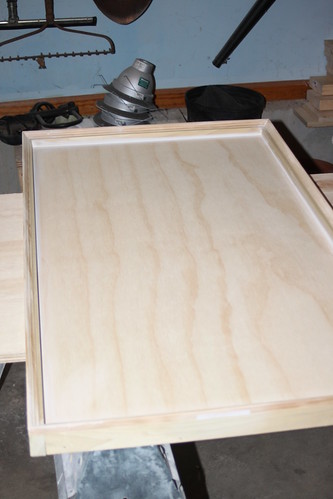
2. Then caulk around the molding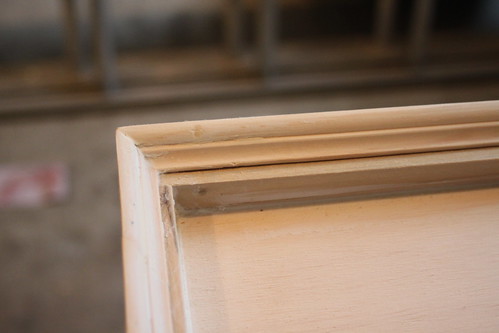
3. Build the actual drying rack with dowel rods and wood
4. Sand to smooth the wood and your caulk (if you are as bad of caulker as I am at least). Also test to ensure that your rack fits within the frame perfectly without sticking. 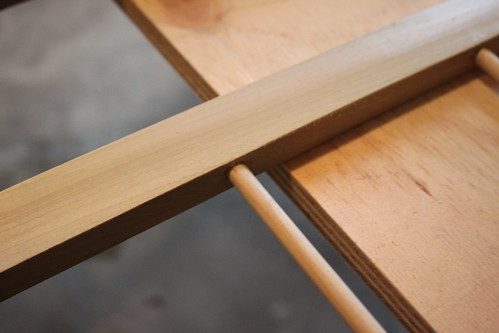
5. Paint it. I spray painted it. And then I decided I did not love the finish so I painted it again with the ole stand by.
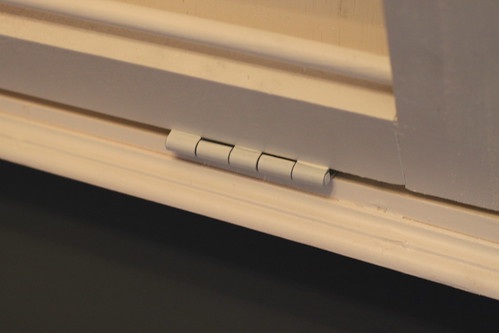
6. Assemble it. Because of the way the frame is, we could not use the hinge and latch the same way that Kate did. So Derek installed two hinges on the bottom.
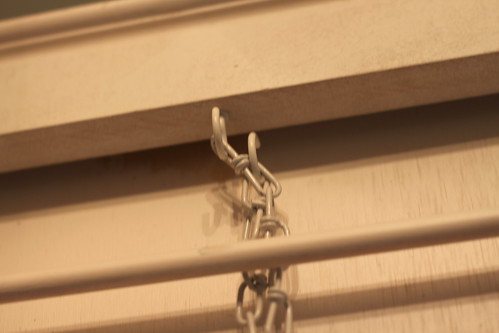
And some hooks and chain at the top for support as well as to latch it closed. Pretend you can’t see the wood filler smudge. It is now all white I swear.
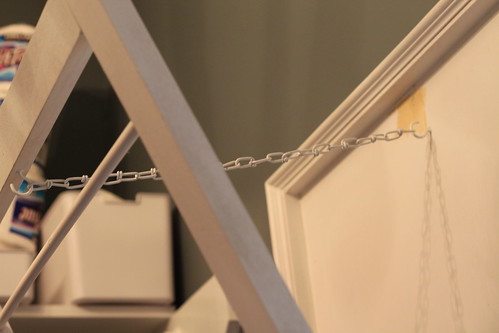
You just move the chain link to latch it (although honestly it is pretty snug so often it remains closed on it’s own)
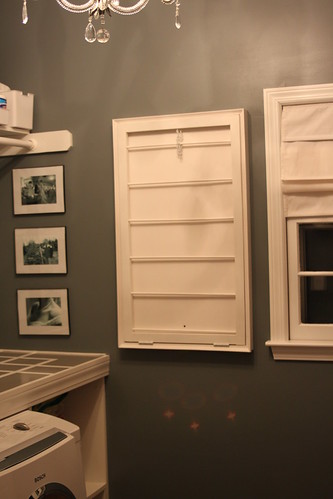
7. Hang it. We just screwed it into the studs in the wall. A little wood filler and paint and you could not tell. (although you can in this picture as I snapped it prematurely)
Like always, this was a totally cheap project. We had the majority of the wood left over from the bed and the dowels I had for some reason in the craft room. And of course we had the paint. So the grand total for some hinges and random wood was $15 at the most. Much better than over $90 at Ballard wouldn’t you say?
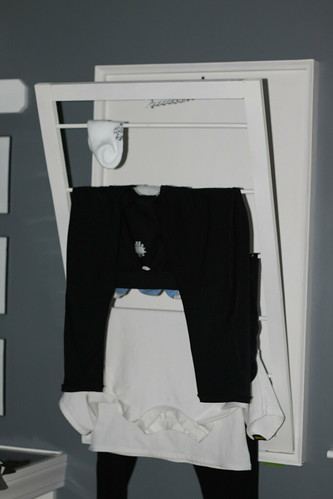
And it works beautifully in the space as evidenced by the running clothes enjoying it…
Happy Drying!
