How-To: Outdoor Rolling Cart
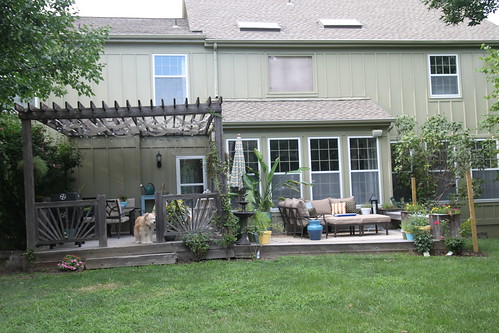
In re-designing our outdoor space, I realized we were lacking some storage. Sure there were tables, chairs and a sectional, but no place to just set stuff. And while the garage was just a few steps away through the interior of the house, I learned quickly that it was just too far in the summer and therefore I just plopped things on the ground.
So we needed a flat surface to set stuff. And it as luck would have it, we had a perfect awkward space for this storage to fit into.

It had to be pretty and look like furniture. I was envisioning a simple slatted console-table like thingy. That I could set stuff on. In a fun color.
That was the very thorough description I gave to Derek.
He took it a couple of steps further and designed and made this-
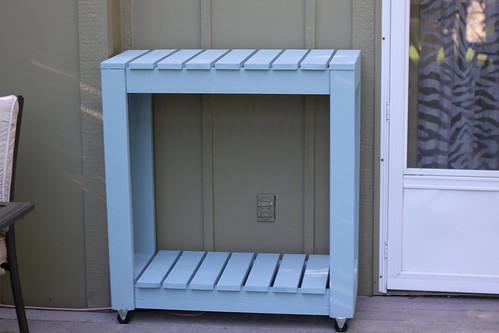
A double decker rolling cart.
Backing up……
After I explained my master vision we headed off to the hardware store for some lumber and outdoor stain. After much debate and price comparison we decided to go with cedar because it was not that much more expensive than pressure treated wood and I could treat it with color right away. And it smelled nice.
And by much debate, I mean we put wood on the cart and then exchanged it for a different kind three times. The Home Depot guys would have thought we were crazy if they did not know us so well from our frequent visits.
Anyway, we spent about $60 on wood.
Now for the Jenny version of the how-to (with pictures of course):
We made the frames for the shelves-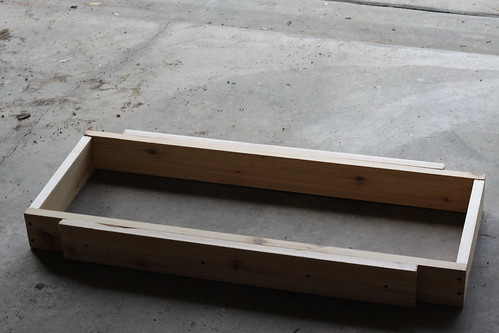
Added the slats-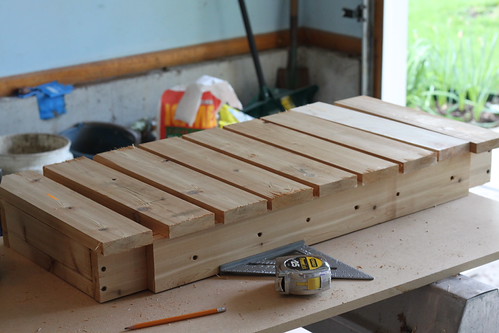
Screwed on the legs-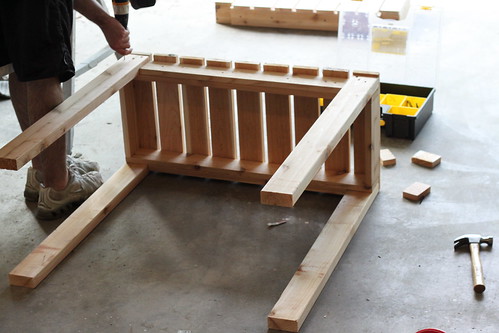
Assembled the layers and added the wheels-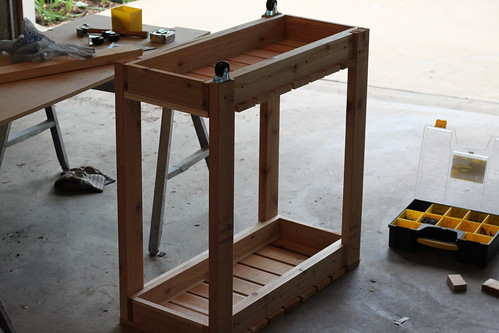
Simple right?
Well for the more technically inclined here is the Derek version with fancy schmancy measurements-
The cart is three main pieces.
The upper shelf is made completely of 1 x 4 boards. The slats are 1x4 of 16 ¾ in length. There are 9 of them spaced approximately ½ inch apart. The long sides are two 1x4 boards hooked together. The outer board is 7 inches shorter than the inner board (29”). The inner board is 36” long. This allows 3 ½ inches on each end for the vertical 2x4. The short sides are connected with a 1x4 that is 11 ¾ inches long. When looking at it from the short side you would see the 1 ½ inch side of the 2x4, then the ¾ inch side of the inner 1x4, the 11 ¾ inch 1x4 and then a mirror of the other side. This totals out to 16 ¾ (1 ½ + ¾ + 11 ¾ + ¾ +1 ½)
The lower shelf is made the same way except the two outer slats are cut shorter to fit within the vertical 2x4’s.
The vertical 2x4’s are however tall you want to make them. Our cart is 37” from the bottom of the vertical 2x4’s to the top of the upper shelf (not counting the wheels).
OK enough of that…back to the pictures.
After the cart was assembled, it was my turn to take over with filling the nail/screw holes and sanding-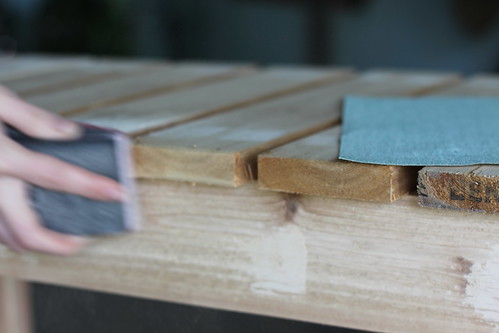
But happily we were going for a rustic outdoor look so not that much sanding was required.
Which is good because sanding is not rated as one my favorite DIY tasks.
I then finished it in an opaque stain in Shipmate Blue.
Ultimately I would have loved to do a semi-transparent stain in blue, but I could not buy it in a quart. And I did not feel so strongly about it to justify the extra cash.
After two coats of stain we got this-
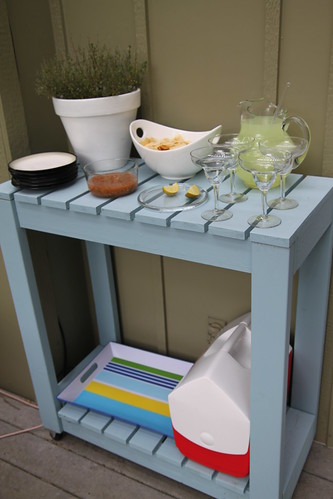
Or should I say this-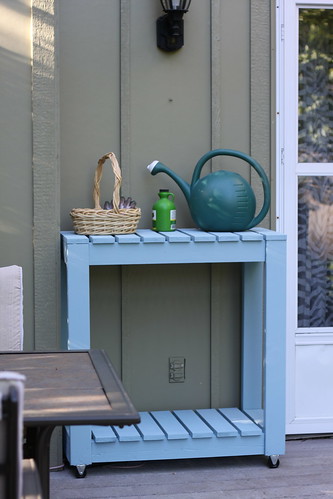
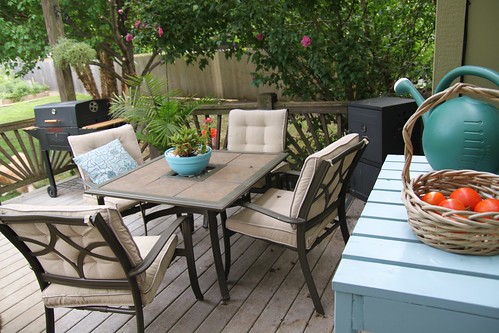
On a typical day I plan on housing most of my gardening supplies here so they are not just scattered around the deck.
But it also can be used for this purpose-
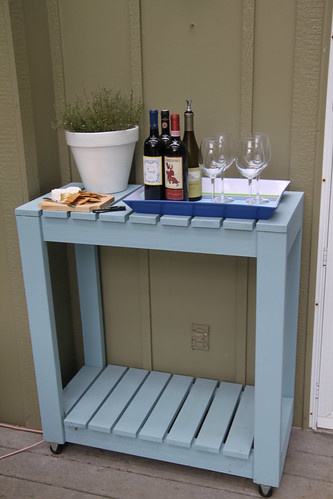
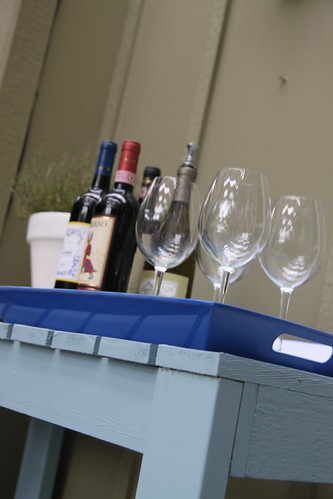
Or for sangria...or a bucket of beer…..or lemonade. Or setting the mint plant on there and whip up some mojitos. Or a serving table for food.
Or a fiesta…
Confession- I was tempted to set up all of these those little vignettes and take pictures to illustrate the many uses of the outdoor cart. But a) it would have been obvious that I had a little too much free time and b) my neighbors were in their backyard….they probably would not look at me the same after seeing me rearrange beverages on the cart six times and then snap pictures. Especially at 8 on a weeknight when it was just the two of us outside.
But I did capture the cart in all of it’s wheeling glory without causing neighborly concern. It makes a perfect BBQing accessory-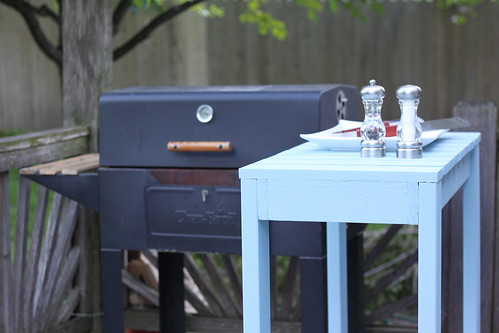
It was super easy to construct (or so I am told) and cost less than $70 for all the materials. And I love the pop of blue.
It looks perfect in the completed outdoor space and I love the functionality.