
How To: Make A Simple Tray
I love trays. You can have a random collection of stuff sitting on a flat surface looking a whole lot like clutter. But with a tray, presto. It looks deliberate and styled. Magic.
Over the past couple of months, we have been trying to spend a little time spiffing up our master bedroom. The room that one could argue should be a top priority had been getting the short end of the decorating stick.
So I wanted a tray for the top of my dresser. And I wanted it to be a very specific size and color. DIY project time.
How To: Easy (and Customizable) Wood Tray
Materials:
Plywood the size of your desired tray
Molding with a rounded edge
Wood filler or caulk
Miter or block of some kind (only a couple of small simple cuts)
Pretty paper for the bottom of the tray
Coordinating Paint Color
Primer
Polyurethane of some kind
Pourable resin (can get at hardware or craft stores)
Hammer and Nails (or nail gun)
Spray Adhesive (optional)
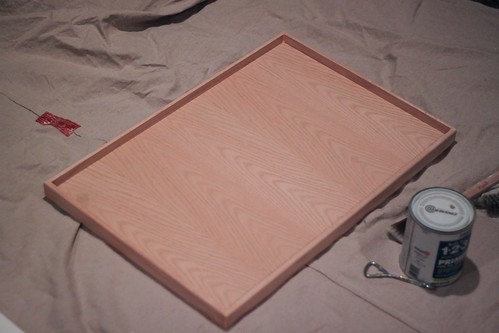
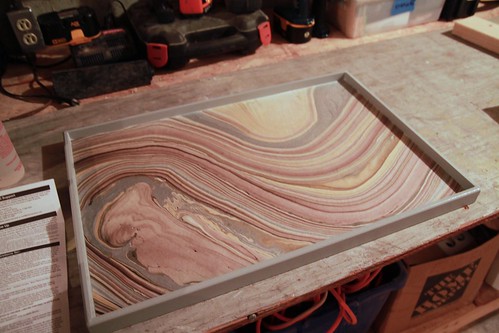
1. Cut you wood to the desired shape. Nail the molding to the side with 90 degree miter cuts at the corners. Use caulk or wood filler to hide the corner seams.
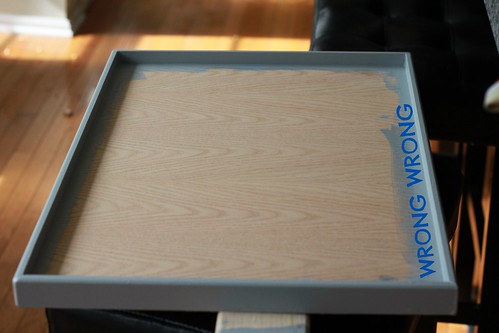
2. Prime and then paint the sides. Here is where I tell you not to do what I did. Either stop the paint before you get any on the tray edge. Or paint the ENTIRE thing. You will see why in a minute.
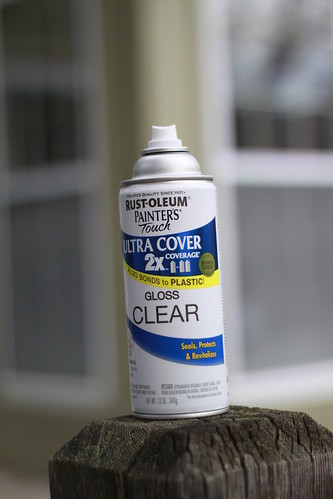
3. Poly the sides. I used a spray.
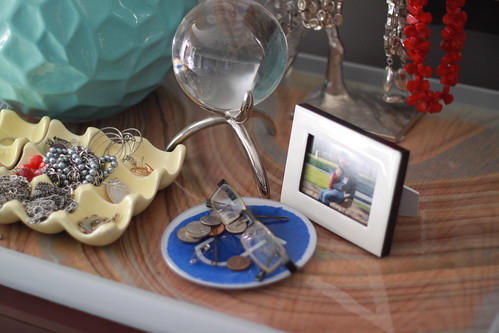
4. Cut your paper to the exact size of the bottom of the tray.
5. Dry fit it and then spray a light coat of spray adhesive to adhere it to the bottom. You could probably skip the spray adhesive and be fine if your paper is a tight fit.
6. Mix your resin and pour according to the directions on the packaging.
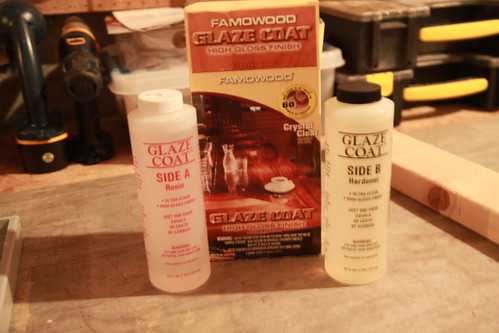
This is when my mistake became apparent. With the resin, my paper became translucent and you could see the wood grain…and my paint line. I did not mind the grain, but the line annoys me. Not enough to redo the whole thing, but enough to tell you about it. Oh well…learn from my mistakes.
7. After the resin hardens the amount of time on the packaging (I believe mine was two days), put your crap in there and watch it become collection-like.
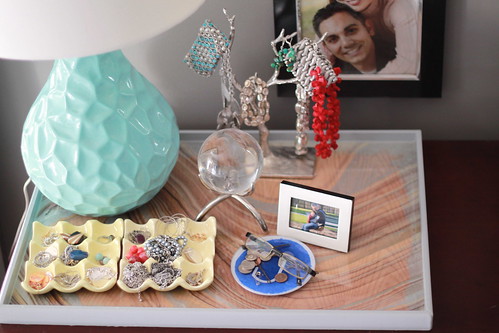
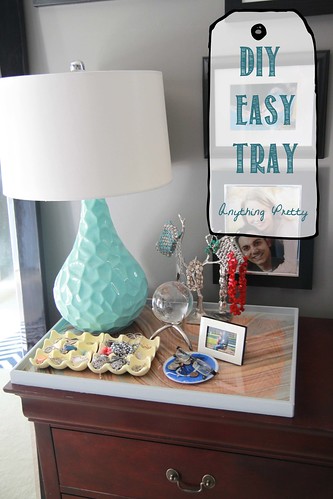
My tray is my dump all on my dresser. And the place where I keep my favorite jewelry. Having it out and seen makes me wear it a whole lot more. And every once in a while I rotate it around.
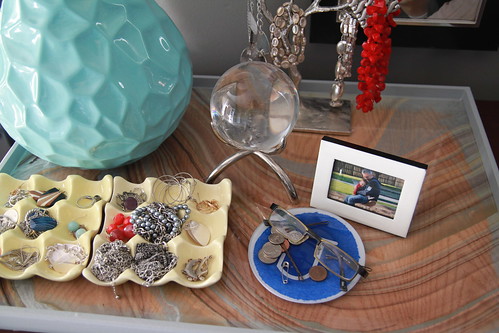
Not to mention I love the marble paper (found a local paper store). And I choose to ignore the blue peeking through.
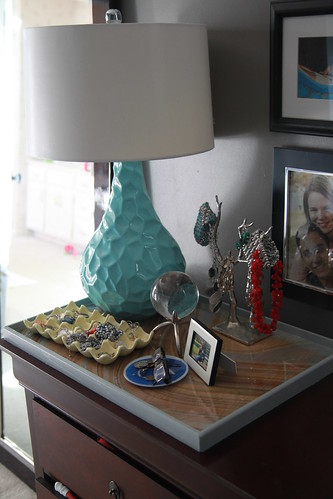
I have been dumping stuff on the tray for two months now and the resin has held up beautifully.
This will be my go-to project for any space that needs some spiffing up. Next time I will do it properly…or choose some thicker paper.